Assigning students |
|
|
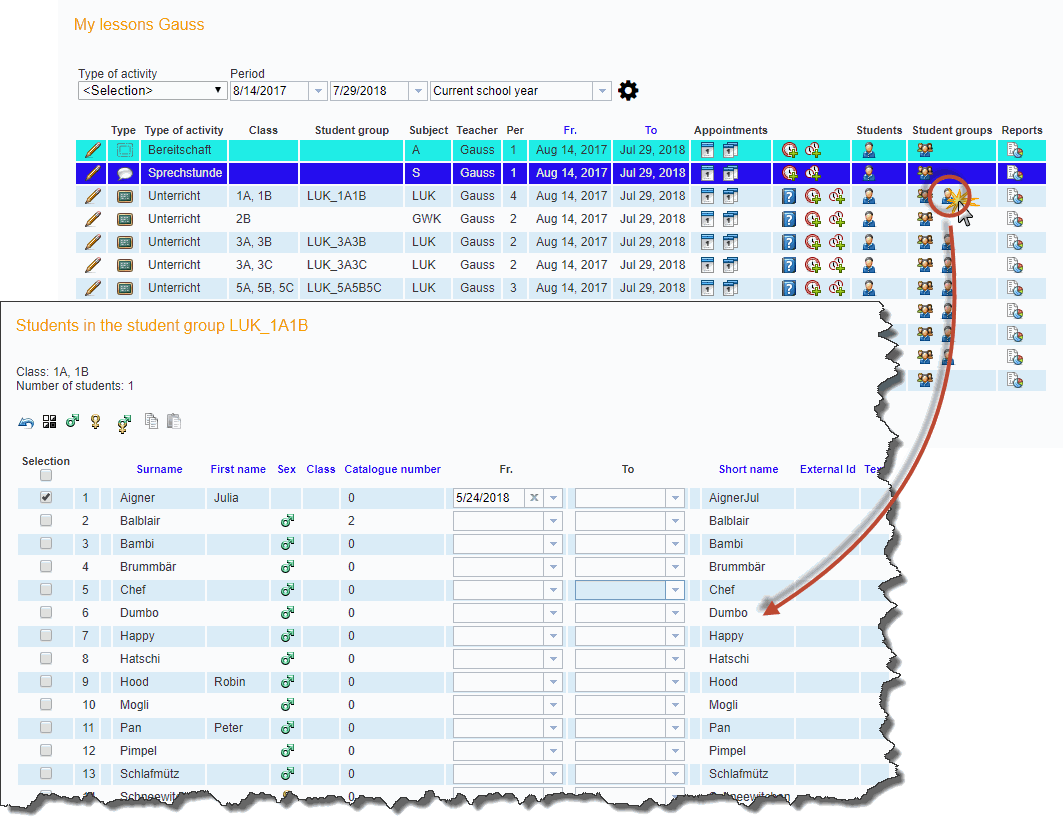
If a student group has already been assigned to a lesson, you will also see an icon with only one head next to the three heads in the 'Student groups' column (<Lessons> | <My lessons>). Clicking on this single head allows you to assign students to the student group or to change the assignment.
A list will be displayed containing the students who can take part in the selected lesson. Check all those student names in the selection list who are to take part in the lesson in question and then click on <Save>. In the fields 'Fr.' and 'To' you can define the time range for which the respective students should be integrated in this student group. If a student is outside of this range, WebUntis will automatically take him/her out of the respective student group. It is possible to edit the from-to data in combination with the main calendar in WebUntis (top right).
Selection functions
Various selection functions are available to help teachers select student groups as easily as possible. The following selection functions are available to you:
Tip: Copy and paste It is not possible to a assign student group to several lessons. You can, however, copy the student assignment to the clipboard and then paste it into another student group. This allows you to quickly make identical student assignments to several lessons. |