Scenarios |
|
|
Scenarios Scenario 1: Creating an exam in WebUntis without chaning the regular lesson (example: one-hour lesson becomes a one-hour exam)
1. Step 1: Creating an exam in WebUntis Click on the respective period in the timetable to open the details of the period. Go to the button with the questionmark to create a new exam:
Select the type of exam:
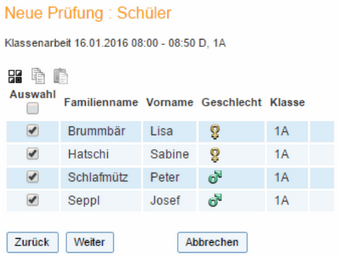
Assign the students who take part in the exam:
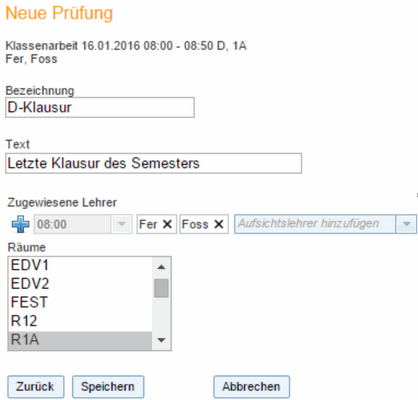
You can optionally give a name to the exam and add a text/description. If you have defined respective user group settings (possible via <Administration> | <User groups> | <edit – pen symbol>) you can change the supervision teacher and rooms:
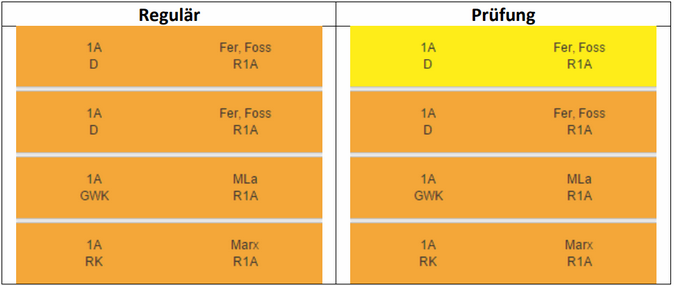
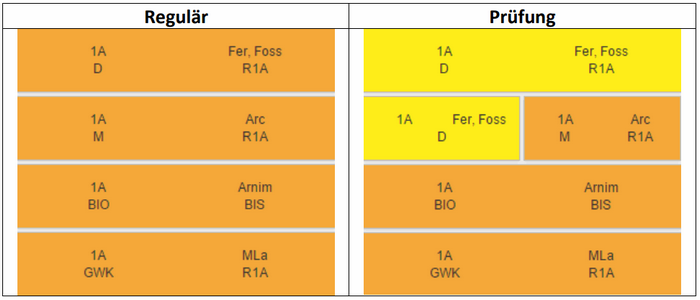
After saving the exam details it is displayed in the timetable the following:
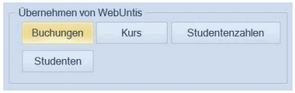
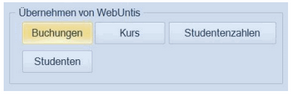
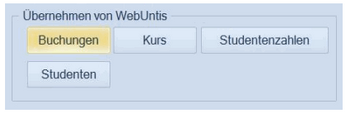
Step 2: Importing of bookings/exams into Untis Open the Import/Export window in Untis and click on the <Bookings> button to import all exams:
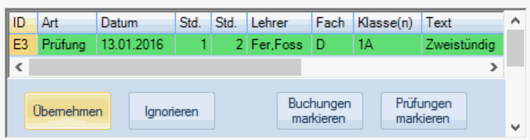
You will then see all exams/bookings which have not yet been exported from WebUntis:
As a next step, either highlight all exams by hand or click on the <Select exams> and click on the <Apply> button.
Note: This exam is not relevant regarding substitutions, therefore it will not be imported into Untis by default. If, however, you want to import exams not relevant regarding substitutions, you can change this option in WebUntis in the settings: <Lesson> | <Settings>.
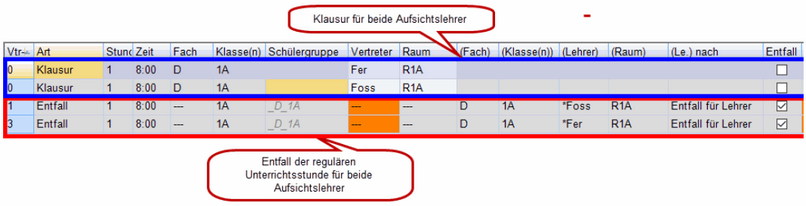
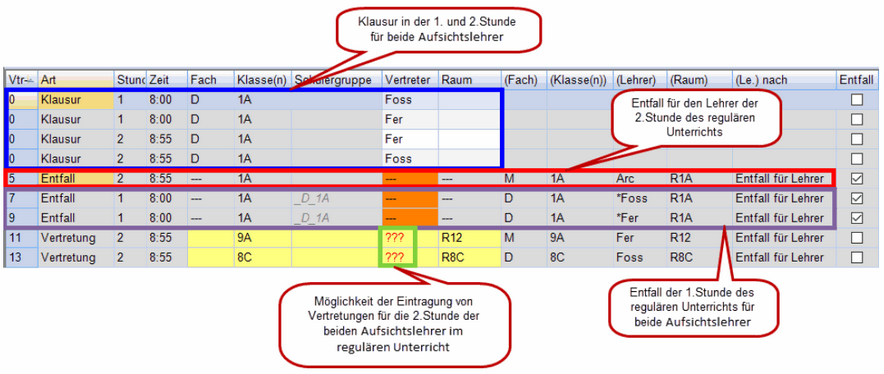
Step 3: Display of exams in substitution window Open the substitutions in substitution planning to see the imported exams:
Examination: an exam is created for both supervision teachers in the first period.
Cancellation: the regular lesson is cancelled in the first period for both supervision teachers
Note: different supervision teacher If you would like to schedule a different teacher for the exam you can do this in the substitution window and then export the substitution to WebUntis. The same is true for changing the room.
Scenario 2: Creating an exam in WebUntis and changing regular lessons (example: one-hour lesson turns into a two-hour exam)
Step 1: Creating an exam in WebUntis Steps for creating an exam: see Scenario 1, Step1 ' Creating an exam in WebUntis'
Step 2: Importing of bookings/exams into Untis Open the Import/Export window in Untis and click on the <Bookings> button to import the exams:
You will then see all exams/bookings which have not yet been exported from WebUntis:
Either highlight all exams by hand or click on the <Select exams> and click on the <Apply> button.
Step 3: Display of exams in substitution window Open the substitutions in substitution planning to see the imported exams:
Examination: an exam is created for both supervision teachers in the first period.
Cancellation: - the second period of the regular lesson of the respective teacher is automatically cancelled - the first period of the regular lesson is cancelled for both teachers
Supervision: it is possible to select a substitution teacher for the second period of the regular lesson for both teachers.
Scenario 3: Creating an exam in WebUntis in a block lesson (example: two-hour lesson turns into a two-hour exam)
Step 1: Creating an exam in WebUntis Steps for creating an exam: see Scenario 1, Step1 ' Creating an exam in WebUntis'
Step 2: Importing of bookings/exams into Untis Open the Import/Export window in Untis and click on the <Bookings> button to import the exams:
You will then see all exams/bookings which have not yet been exported from WebUntis:
Either highlight all exams by hand or click on the <Select exams> and click on the <Apply> button.
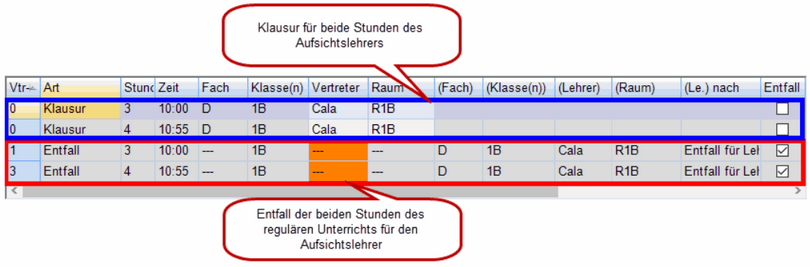
Step 3: Display of exams in substitution window Open the substitutions in substitution planning to see the imported exams:
Examination: an examination is created in both periods for the supervision teacher
Cancellation: both periods of the regular lesson are cancelled for the supervision teacher
Scenario 4: Creating an examination in Untis Course Scheduling (only possible with “Course Scheduling” module)
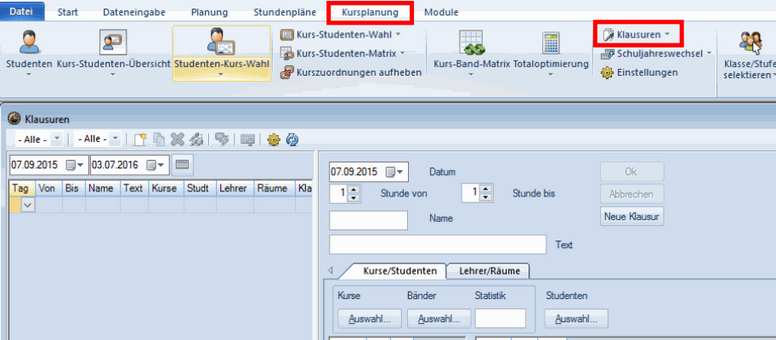
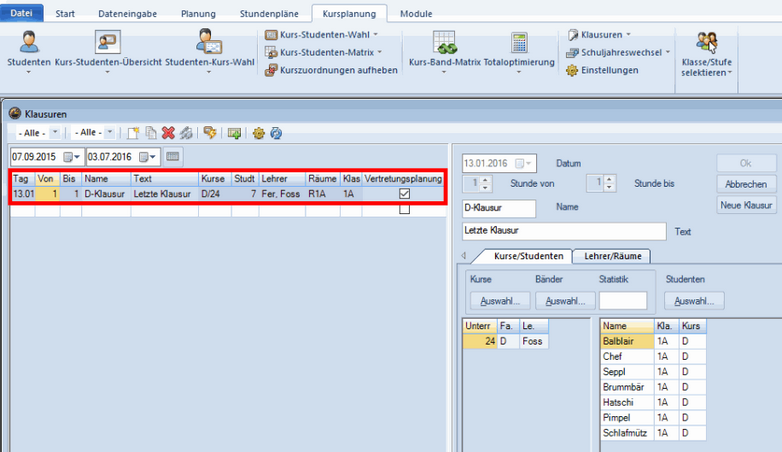
Step 1: Creating an examination in Untis Go to <Course Scheduling> and click on the <Examination> button. The examination window is opened:
Create a new examination by clicking on the <New exam> button. You need details such as exam name, date, period, teacher, rooms and course/lesson:
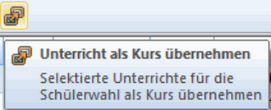
Note: In the lesson window, lessons can be imported as courses by clicking on the following button:
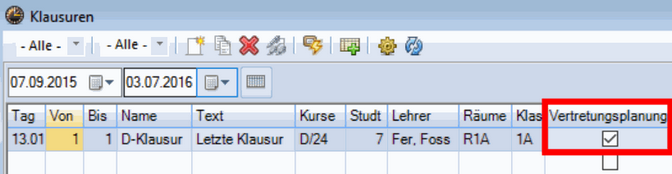
Note: The <Substitution planning> column must be activated in order to be able to administer the examination in substitution planning.
Changing to Substitution Planning after creating an exam:
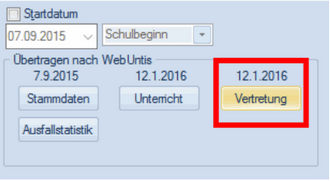
Examination: an exam is created for both teachers in the first period. Cancellation: the regular lesson is cancelled in the first period for both teachers Step 2: Export of examination to WebUntis Export the substitutions then to WebUntis (exams are transferred as well):
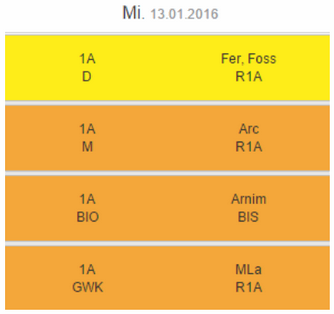
The exam is displayed in the WebUntis timetable as follows:
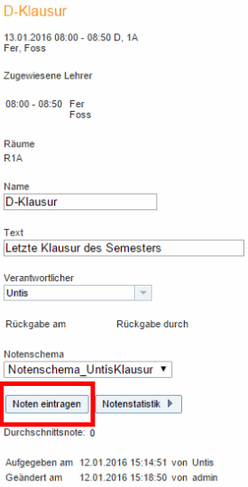
Click on the exam period in the timetable and select the questionmark icon in the details of the period (you can also get to the exam via the class registration main page):
Here you can give grades:
Note: default examination type It is best to create a default examination type for examinations to be imported from Untis. In WebUntis you will find this option under <Administration> | <Integration> | <Untis> | <Default exam-type for exams>.
Note: Grading schemes If you do not have any possibility to grade the students during the exam make sure that youhave created a grading scheme. Create grading schemes: <Master data> | <Grading schemes> and assign them to the respective exam types under <Master data> | <Types of examinations>.
Note: Change of examination in different program Changing an examination imported from Untis is not possible in WebUntis. You need to do the changes in Untis in this case. |